{var%20f='http://v.t.sina.com.cn/share/share.php?appkey=1515056452',u=z||d.location,p=['&url=',e(u),'&title=',e(t||d.title),'&source=',e(r),'&sourceUrl=',e(l),'&content=',c||'gb2312','&pic=',e(p||'')].join('');function%20a(){if(!window.open([f,p].join(''),'mb',['toolbar=0,status=0,resizable=1,width=440,height=430,left=',(s.width-440)/2,',top=',(s.height-430)/2].join('')))u.href=[f,p].join('');};if(/Firefox/.test(navigator.userAgent))setTimeout(a,0);else%20a();})(screen,document,encodeURIComponent,'','','http://www.shouhuola.com/static/css/dist/css/images/default.jpg', '推荐 上瘾入骨i 的文章《Hive性能调优之Fetch抓取(1)》','http://www.shouhuola.com/article-1757.html','页面编码gb2312|utf-8默认gb2312'));)
我们在刚开始学习hive的时候,都知道hive可以降低程序员的学习成本和开发成本,具体表现就在于可以将SQL语句转换成MapReduce程序运行。
但是Hive中对某些情况的查询可以不必使用MapReduce计算。例如:SELECT * FROM employees;在这种情况下,Hive可以简单地读取employee对应的存储目录下的文件,然后输出查询结果到控制台。
在hive-default.xml.template文件中hive.fetch.task.conversion默认是more,老版本hive默认是minimal,该属性修改为more以后,在全局查找、字段查找、limit查找等都不走mapreduce。
<property>
    <name>hive.fetch.task.conversion</name>
    <value>more</value>
    <description>
      Expects one of [none, minimal, more].
      Some select queries can be converted to single FETCH task minimizing latency.
      Currently the query should be single sourced not having any subquery and should not have
      any aggregations or distincts (which incurs RS), lateral views and joins.
      0. none : disable hive.fetch.task.conversion
    </description>
  </property>
接下来让我们通过一些实操,来查看一下效果!
案例实操
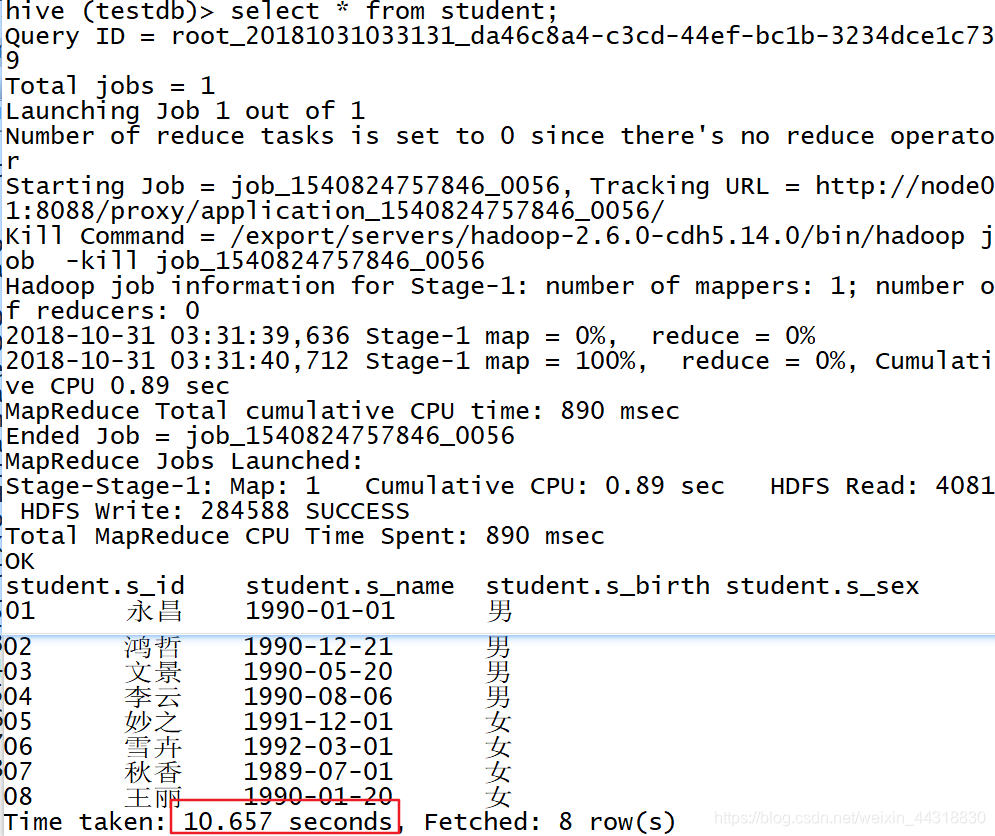
<1>把hive.fetch.task.conversion设置成none,然后执行查询语句,都会执行mapreduce程序。
hive (default)> set hive.fetch.task.conversion=none;
hive (default)> select * from score;
hive (default)> select s_score from score;
hive (default)> select s_score from score limit 3;
<2>把hive.fetch.task.conversion设置成more,然后执行查询语句,如下查询方式都不会执行mapreduce程序。
hive (default)> set hive.fetch.task.conversion=more;
hive (default)> select * from score;
hive (default)> select s_score from score;
hive (default)> select s_score from score limit 3;

我们可以明显发现当把hive.fetch.task.conversion设置成none,所有的程序都走mapreduce程序会耗费一定的时间。
但就算设置成none,也只有部分sql语句会不走mapreduce程序,那有没有什么办法可以优化这个问题呢?
![]()
![]() 本地模式
本地模式
大多数的Hadoop Job是需要Hadoop提供的完整的可扩展性来处理大数据集的。不过,有时Hive的输入数据量是非常小的。在这种情况下,为查询触发执行任务时消耗可能会比实际job的执行时间要多的多。对于大多数这种情况,Hive可以通过本地模式在单台机器上处理所有的任务。对于小数据集,使用本地模式执行时间可以明显被缩短。
用户可以通过设置hive.exec.mode.local.auto的值为true,来让Hive在适当的时候自动启动这个优化。
set hive.exec.mode.local.auto=true; //开启本地mr
设置local mr的最大输入数据量,当输入数据量小于这个值时采用local mr的方式,默认为134217728,即128M
set hive.exec.mode.local.auto.inputbytes.max=51234560;
设置local mr的最大输入文件个数,当输入文件个数小于这个值时采用local mr的方式,默认为4
set hive.exec.mode.local.auto.input.files.max=10;
案例实操:
<1>开启本地模式,并执行查询语句
hive (default)> set hive.exec.mode.local.auto=true;
hive (default)> select * from score cluster by s_id;
18 rows selected (1.568 seconds)
<2>关闭本地模式,并执行查询语句
hive (default)> set hive.exec.mode.local.auto=false;
hive (default)> select * from score cluster by s_id;
18 rows selected (11.865 seconds)
![]()
![]() Group By
Group By
默认情况下,Map阶段同一Key数据分发给一个reduce,当一个key数据过大时就倾斜了。
并不是所有的聚合操作都需要在Reduce端完成,很多聚合操作都可以先在Map端进行部分聚合,最后在Reduce端得出最终结果。
<1>开启Map端聚合参数设置set hive.map.aggr = true;
<2>在Map端进行聚合操作的条目数目set hive.groupby.mapaggr.checkinterval = 100000;
<3>有数据倾斜的时候进行负载均衡(默认是false)set hive.groupby.skewindata = true;
当选项设定为 true,生成的查询计划会有两个MR Job。第一个MR Job中,Map的输出结果会随机分布到Reduce中,每个Reduce做部分聚合操作,并输出结果,这样处理的结果是相同的Group By Key有可能被分发到不同的Reduce中,从而达到负载均衡的目的;第二个MR Job再根据预处理的数据结果按照Group By Key分布到Reduce中(这个过程可以保证相同的Group By Key被分布到同一个Reduce中),最后完成最终的聚合操作。
![]()
![]() Count(distinct)
Count(distinct)
数据量小的时候无所谓,数据量大的情况下,由于COUNT DISTINCT操作需要用一个Reduce Task来完成,这一个Reduce需要处理的数据量太大,就会导致整个Job很难完成,一般COUNT DISTINCT使用先GROUP BY再COUNT的方式替换:
环境准备:
create table bigtable(id bigint, time bigint, uid string, keyword string, url_rank int, click_num int, click_url string) row format delimited fields terminated by '\t';

load data local inpath '/home/admin/softwares/data/100万条大表数据(id除以10取整)/bigtable' into table bigtable;

set hive.exec.reducers.bytes.per.reducer=32123456;
测试:SELECT count(DISTINCT id) FROM bigtable;
结果:c0 10000 Time taken: 35.49 seconds, Fetched: 1 row(s)
可以转换成:
set hive.exec.reducers.bytes.per.reducer=32123456;SELECT count(id) FROM (SELECT id FROM bigtable GROUP BY id) a;
结果:Stage-Stage-1: Map: 1 Reduce: 4 Cumulative CPU: 13.07 sec HDFS Read: 120749896 HDFS Write: 464 SUCCESS Stage-Stage-2: Map: 3 Reduce: 1 Cumulative CPU: 5.14 sec HDFS Read: 8987 HDFS Write: 7 SUCCESS _c0 10000 Time taken: 51.202 seconds, Fetched: 1 row(s)
虽然会多用一个Job来完成,但在数据量大的情况下,这个绝对是值得的。
![]()
![]() 笛卡尔积
笛卡尔积
尽量避免笛卡尔积,即避免join的时候不加on条件,或者无效的on条件,Hive只能使用1个reducer来完成笛卡尔积。
![]()
![]() 使用分区剪裁、列剪裁
使用分区剪裁、列剪裁
在SELECT中,只拿需要的列,如果有,尽量使用分区过滤,少用SELECT *。
在分区剪裁中,当使用外关联时,如果将副表的过滤条件写在Where后面,那么就会先全表关联,之后再过滤,比如:
环境准备:
create table ori(id bigint, time bigint, uid string, keyword string, url_rank int, click_num int, click_url string) row format delimited fields terminated by '\t';

create table bigtable(id bigint, time bigint, uid string, keyword string, url_rank int, click_num int, click_url string) row format delimited fields terminated by '\t';

load data local inpath '/home/admin/softwares/data/加递增id的原始数据/ori' into table ori;

load data local inpath '/home/admin/softwares/data/100万条大表数据(id除以10取整)/bigtable' into table bigtable;
先关联再Where:
SELECT a.id
FROM bigtable a
LEFT JOIN ori b ON a.id = b.id
WHERE b.id <= 10;
正确的写法是写在ON后面:先Where再关联
SELECT a.id
FROM ori a
LEFT JOIN bigtable b ON (b.id <= 10 AND a.id = b.id);
或者直接写成子查询:
SELECT a.id
FROM bigtable a
RIGHT JOIN (SELECT id
FROM ori
WHERE id <= 10
) b ON a.id = b.id;
![]()
![]() 动态分区调整
动态分区调整
关系型数据库中,对分区表Insert数据时候,数据库自动会根据分区字段的值,将数据插入到相应的分区中,Hive中也提供了类似的机制,即动态分区(Dynamic Partition),只不过,使用Hive的动态分区,需要进行相应的配置。
以第一个表的分区规则,来对应第二个表的分区规则,将第一个表的所有分区,全部拷贝到第二个表中来,第二个表在加载数据的时候,不需要指定分区了,直接用第一个表的分区即可
<1>开启动态分区参数设置
①set hive.exec.dynamic.partition=true;
②设置为非严格模式(动态分区的模式,默认strict,表示必须指定至少一个分区为静态分区,nonstrict模式表示允许所有的分区字段都可以使用动态分区。)set hive.exec.dynamic.partition.mode=nonstrict;
③在所有执行MR的节点上,最大一共可以创建多少个动态分区。set hive.exec.max.dynamic.partitions=1000;
④在每个执行MR的节点上,最大可以创建多少个动态分区。该参数需要根据实际的数据来设定。比如:源数据中包含了一年的数据,即day字段有365个值,那么该参数就需要设置成大于365,如果使用默认值100,则会报错。set hive.exec.max.dynamic.partitions.pernode=100
⑤整个MR Job中,最大可以创建多少个HDFS文件。
在linux系统当中,每个linux用户最多可以开启1024个进程,每一个进程最多可以打开2048个文件,即持有2048个文件句柄,下面这个值越大,就可以打开文件句柄越大set hive.exec.max.created.files=100000;
⑥当有空分区生成时,是否抛出异常。一般不需要设置。set hive.error.on.empty.partition=false;
<2>案例实操
需求:将ori中的数据按照时间(如:20111231234568),插入到目标表ori_partitioned的相应分区中。
①准备数据原表
create table ori_partitioned(id bigint, time bigint, uid string, keyword string, url_rank int, click_num int, click_url string)
PARTITIONED BY (p_time bigint)
row format delimited fields terminated by '\t';

load data local inpath '/export/servers/hivedatas/small_data' into  table ori_partitioned partition (p_time='20111230000010');

load data local inpath '/export/servers/hivedatas/small_data' into  table ori_partitioned partition (p_time='20111230000011');
②创建分区表
create table ori_partitioned_target(id bigint, time bigint, uid string, keyword string, url_rank int, click_num int, click_url string) PARTITIONED BY (p_time STRING) row format delimited fields terminated by '\t';
③分析
如果按照之前介绍的往指定一个分区中Insert数据,那么这个需求很不容易实现。这时候就需要使用动态分区来实现。
set hive.exec.dynamic.partition = true;
set hive.exec.dynamic.partition.mode = nonstrict;
set hive.exec.max.dynamic.partitions = 1000;
set hive.exec.max.dynamic.partitions.pernode = 100;
set hive.exec.max.created.files = 100000;
set hive.error.on.empty.partition = false;

INSERT overwrite TABLE ori_partitioned_target PARTITION (p_time)
SELECT id, time, uid, keyword, url_rank, click_num, click_url, p_time
FROM ori_partitioned;
注意:在PARTITION (month,day)中指定分区字段名即可;
在SELECT子句的最后几个字段,必须对应前面PARTITION (month,day)中指定的分区字段,包括顺序。
查看分区:
hive> show partitions ori_partitioned_target;
OK
p_time=20111230000010
p_time=20111230000011
本次的分享就到这里咯,后续小菌还会为大家带来Hive性能调优的其他系列,敬请期待!受益的小伙伴们记得点赞哦٩(๑❛ᴗ❛๑)۶

作者:Alice菌
链接:https://blog.csdn.net/weixin_44318830/article/details/103328738
来源:CSDN
著作权归作者所有。商业转载请联系作者获得授权,非商业转载请注明出处